
Configuring Nested table for a Workflow field
Nested tables allow you to create a table within a table. Follow the steps below to configure the nested table.
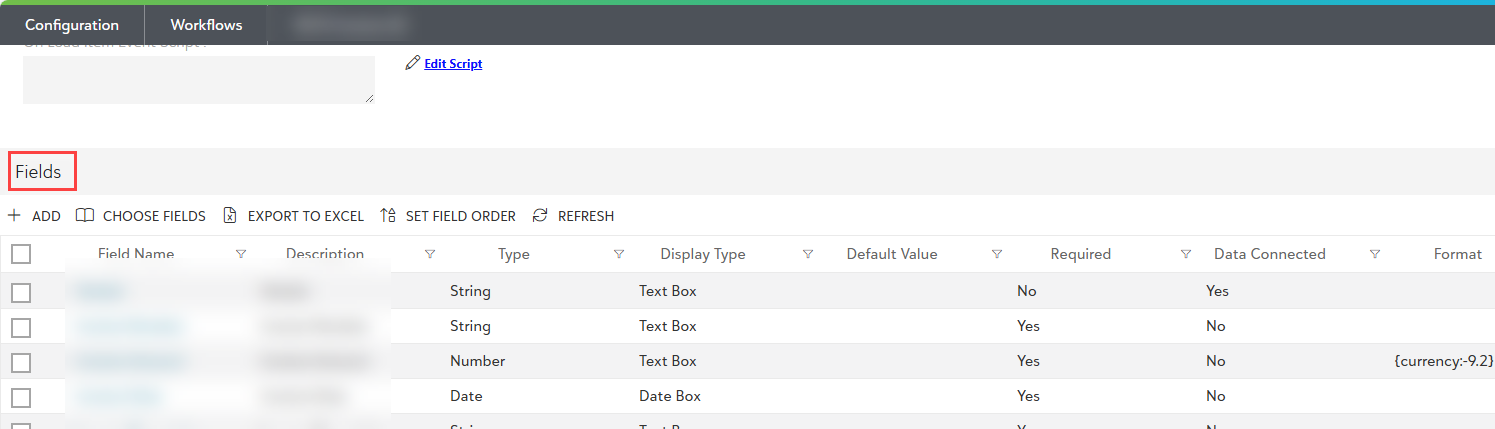
1) Navigate to the Fields section of the desired Workflow from the configuration Area.
2) Open the existing "Table type Workflow field" where you wish to configure the nested table. This is the "parent" table.
3) Under the parent table's columns, check if a Table type field is already added.
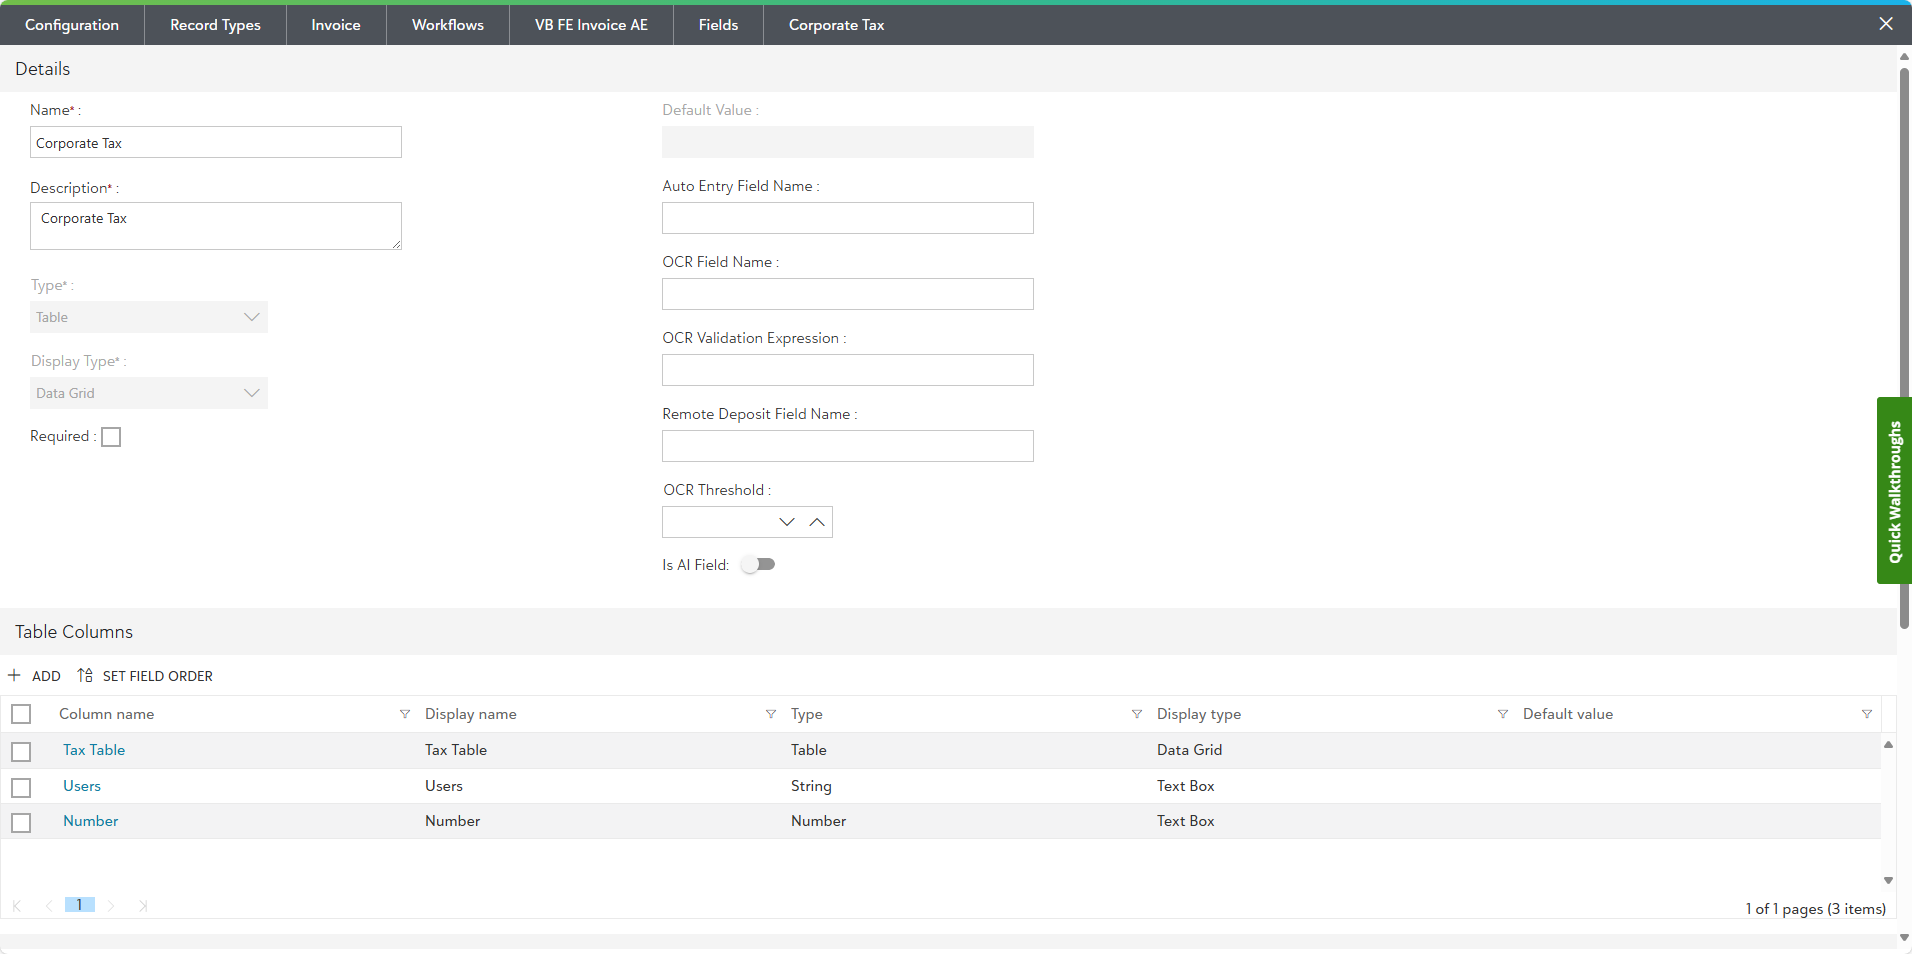
4) If not added, click the Add button to add a new column and select Table as the field type.

5) Fill in the necessary details for this new table field and click on the on the Save column.
- Name: Enter the name of the column. (ex: Tax Table)
- Display Name: Enter the display name of the column. It is an optional field.
- Display Type: select the display type from the pre-defined drop-down list.
- Type: select the type from the pre-defined drop-down list.
- OCR Field Name: Enter the OCR field name.

Note: A parent table can only contain one direct Table type field to serve as the nested table.
6) Open the newly added Table type field (the "nested" table) by clicking on it. You will find the Table columns for Tax Table as shown below.

7) Click on the Add button within the nested table's column section. Fill in the necessary details for the column, such as:
- Name: Enter the name of the column.
- Display Name: Enter the display name of the column. It is an optional field.
- Display Type: select the display type from the pre-defined drop-down list.
- Type: select the type from the pre-defined drop-down list.
- OCR Field Name: Enter the OCR field name.
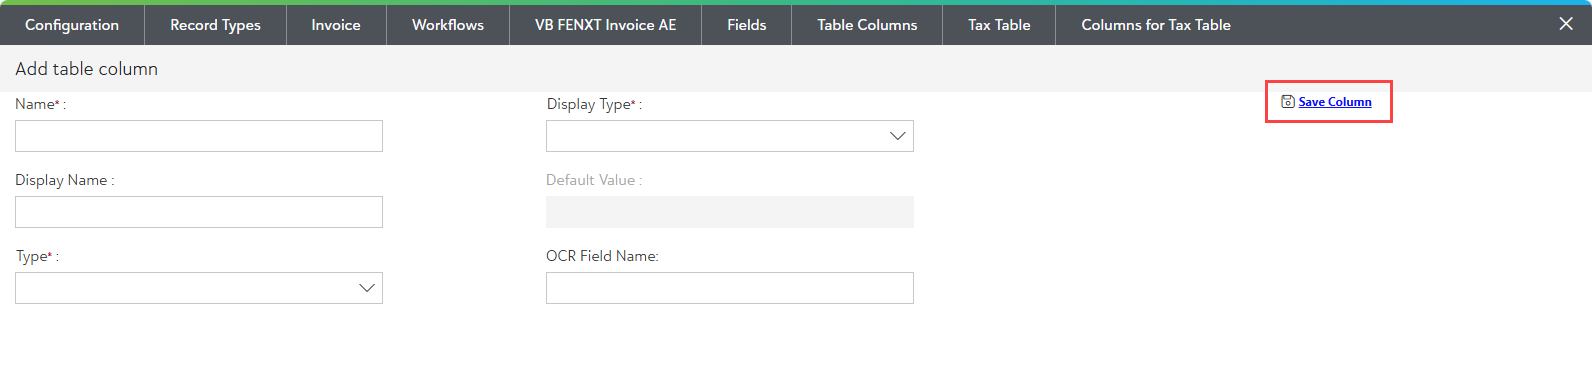
8. Click on the Save Column button.
Note: You can also configure the nested table for a Document Type by navigating to Configuration Area General Settings → Document Types. Go to the Fields section, and from there, configure the nested table for any Table-type field associated with that Document Type.